

A template is a saved list of views. Use one to reselect the same views in a later extraction or ingestion without ticking them one by one, or to share a selection with a colleague.
none1. Prerequisites
IntelliAI installed and activated. See Get Started With IntelliAI.
To save a template: you're signed in to your source environment and the view tree on the Extraction tab is showing. See Extract Data From a Source Environment.
To apply a template to an ingestion: at least one completed extraction, so the Ingestion tab has views to select. See Ingest Data Into a Destination Environment.
2. Open the Templates panel
Select Templates next to the search box above the view tree. The button shows how many templates you have saved, for example Templates (3).
The panel opens on the right. Templates are one shared list: a template you save from the Extraction tab also appears on the Ingestion tab, and the other way around.
What you can do depends on the tab you opened the panel from:
Action | Extraction tab | Ingestion tab |
|---|---|---|
Apply a template | Yes | Yes |
Save a template | Yes | No |
Update, rename, or delete a template | Yes | No |
Export or import a template | Yes | No |
To manage templates, open the panel from the Extraction tab.
3. Save a selection as a template
On the Extraction tab, select the views you want to keep as a template.
Select Templates.

Under Save current selection, enter a name in Template Name. The panel shows how many views you've selected.
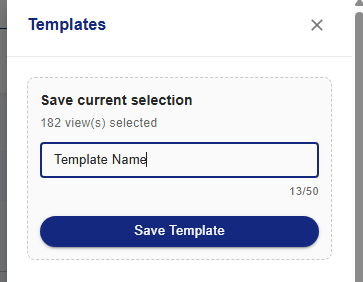
Select Save Template.
IntelliAI confirms with Template "<name>" saved. and adds it to Saved templates.
Save Template is available once you've entered a valid name and selected at least one view.
A template name:
Can be up to 50 characters.
Can't include any of these characters:
< > : " / \ | ? *Can't end with a dot.
Can't be a name Windows reserves, such as
CON,NUL,COM1, orLPT1.Can't match the name of a built-in template.
If you enter the name of a template you already saved (capitalization doesn't matter), IntelliAI warns you that saving will replace it. Select Save Template to replace that template's views with your current selection.
4. Apply a template
Applying a template selects the views it lists, so you don't have to find and tick each one.
Open the Extraction or Ingestion tab.
Select Templates.
On the template's card, select Apply to current selection.
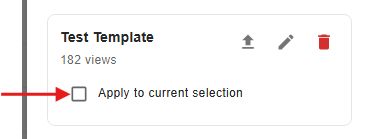
The label changes to Applied - views in selection, and the views appear selected in the view tree. Close the panel to review them, then start the extraction or ingestion as usual.
Keep these points in mind:
Applying a template adds its views to whatever you've already selected. It doesn't clear your existing selection.
Applying a template selects exactly the views it lists. It doesn't also select their dependencies.
To remove a template's views from your selection, clear the Applied — views in selection checkbox.
Views that are no longer in the catalog are skipped without a warning. On the Ingestion tab, views that weren't part of your most recent extraction are skipped the same way.
5. Update a template with your current selection
To change which views a template holds without retyping its name:
On the Extraction tab, select the views you want the template to contain.
Select Templates.
On the template's card, select the overwrite icon (tooltip: Overwrite this template with the current selection). This icon only appears while you have at least one view selected.
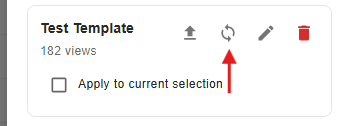
Select Overwrite to confirm.
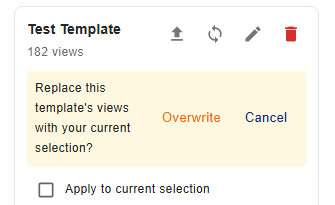
IntelliAI confirms with Template "<name>" updated with current selection. The template's old views are replaced, not merged.
6. Rename a template
On the Extraction tab, select Templates.
On the template's card, select the pencil icon.
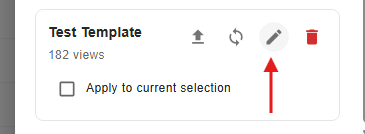
Enter the new name, then select the check mark to save, or the X to cancel.
The new name must follow the naming rules and can't match another template. Unlike Save Template, renaming never replaces another template.
7. Delete a template
On the Extraction tab, select Templates.
On the template's card, select the trash icon.
Select Delete to confirm.
IntelliAI confirms with Template deleted. There's no undo, so export the template first if you might need it again.
8. Export a template
Export a template to share it with another machine or keep a backup.
On the Extraction tab, select Templates.
On the template's card, select the export icon (tooltip: Export this template to a .json file).
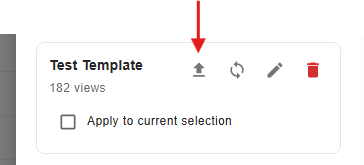
Your browser saves a file named <template name>.json. The file holds the template's name and the views it lists. It doesn't contain any extracted data.
9. Import a template
On the machine you're importing to, open the Extraction tab and select Templates.
Select Import (tooltip: Import a template from a .json file).
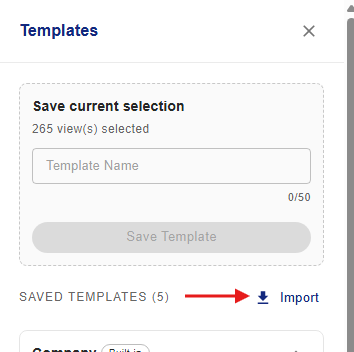
Choose the
.jsonfile.
IntelliAI confirms with Template "<name>" imported.
If you already have a template with the same name, IntelliAI asks Replace existing template? Select Replace to overwrite its views with the ones in the file, or Cancel to keep your own.
IntelliAI rejects a file, and tells you why, if:
It isn't readable JSON, or has no template name.
The name breaks the naming rules or matches a built-in template.
It lists no views, or lists views in an unrecognized format.
Views from the file that don't exist in this machine's catalog are skipped when you apply the template. If the catalog on the new machine is empty, select Refresh Views first. See Refresh the view catalog.
10. Built-in templates
IntelliAI ships with these templates, marked Built-in. They appear at the top of the list.
Company
Customer
CustomerOrder
ShopOrder
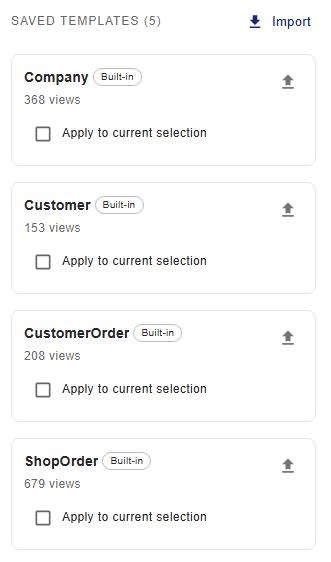
Built-in templates are read-only. You can apply and export them, but you can't rename, overwrite, or delete them, and you can't reuse their names for your own templates.
11. Where templates are stored
Each template is saved as its own .json file, named after the template, in the Data/DataMigration/metadata/templates folder. Templates persist between app runs.
12. Next steps
Last updated 10/15/2026