

Extract Data From a Source Environment
This doc walks you through selecting views in your source IFS Cloud environment, running an extraction, and monitoring its progress.
none1. Prerequisites
IntelliAI installed and activated. See Get Started With IntelliAI.
An IAM client set up in your source IFS Cloud environment.
2. Connect Your Source Environment
On the landing page, open IntelliMig.
In the source environment field, enter the hostname of your source IFS Cloud environment, for example
https://mycompany.ifs.cloud.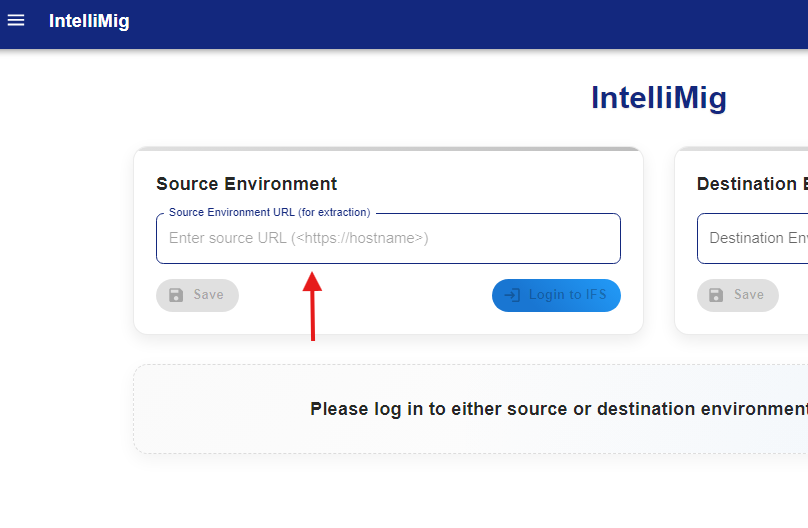
Select Login. A popup window opens to your IFS environment's login page.
Sign in with your IFS credentials. The popup closes automatically and returns you to IntelliAI, now signed in to your source environment.
You can only be signed in to one environment, source or destination, at a time. Signing in to your destination environment automatically signs you out of your source environment, and the other way around. This is expected: switch between them by logging in to whichever side you need next.
3. Refresh the View Catalog
Next to Available Views, a chip shows whether the view tree is Cached or Refreshed.
To pull the latest views directly from IFS, select Refresh Views.
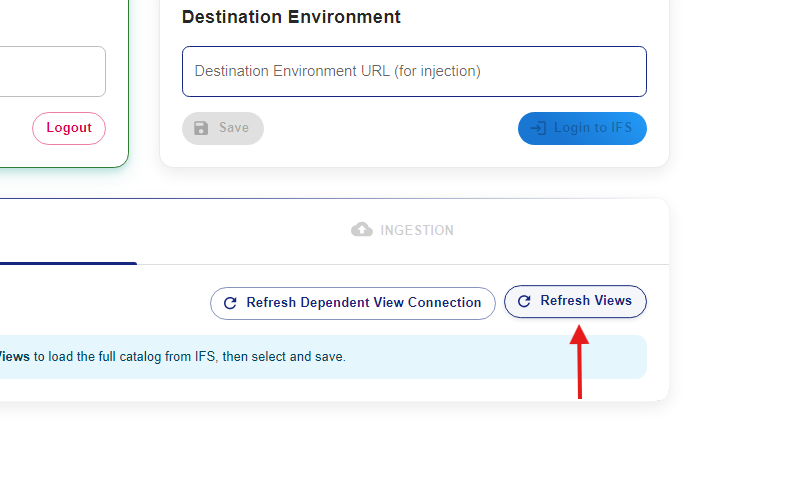
While IntelliAI fetches your views, the button reads Refreshing... and the view tree shows a loading spinner.
Once the fetch finishes, the chip changes to Refreshed, confirming the tree reflects your source environment's current views. IntelliAI also saves this refreshed catalog locally, so it loads instantly next time.
If you don't select Refresh Views, IntelliAI shows views from that locally saved catalog by default, labeled with the Cached chip. This loads instantly, but may not reflect recent changes in your source environment.
The first time you sign in to a source environment, there's no local catalog yet, so the view tree is empty until you select Refresh Views.
3.1 Refresh Dependent View Connection
Next to Refresh Views is a separate button, Refresh Dependent View Connection, with its own tooltip showing when it was last refreshed (for example, "Last refreshed: Jun 08, 2026", or "Last refreshed: Not Refreshed" if it never has been). This is unrelated to the Cached/Refreshed chip and doesn't affect the view catalog.
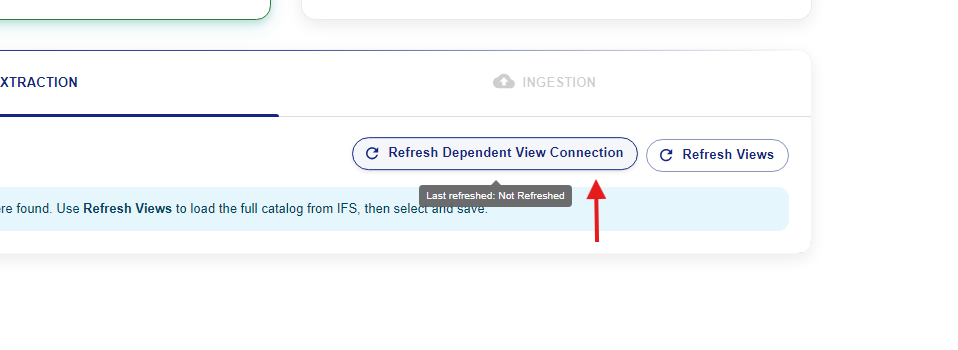
This button also turns on Auto-select dependencies, resetting it to on even if you'd previously turned it off yourself.
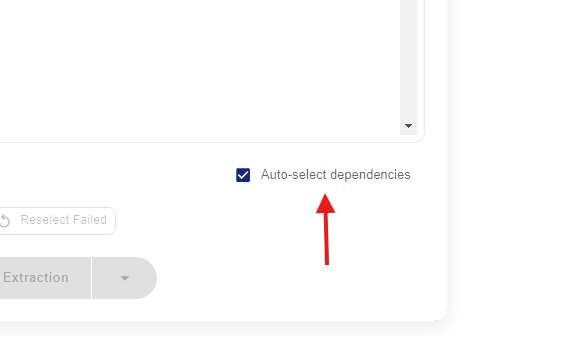
While Auto-select dependencies is on, selecting a view also selects every other view it depends on through referenced fields, parent key fields including dependencies of those dependencies, and so on. Deselecting a view works the same way in reverse: it also deselects every view that was pulled in through that chain of dependencies, even if you'd separately selected one of those views yourself.
While Auto-select dependencies is off, selecting or deselecting a view only affects that one view. No dependency chain is followed either way.
4. Select Views to Extract
On the IntelliMig page, use the search box to find views by name, or browse the view tree. Views are grouped by module.
Select the checkbox next to each view you want to extract. Selecting a module's checkbox selects every view in that module.
Use Select All or Deselect All to select or clear every view at once.
Turn on Show only selected to review just the views you've checked.
Extraction always exports all data in each selected view. There's no option to filter by date range or record count.
4.1 Save your view selection (optional)
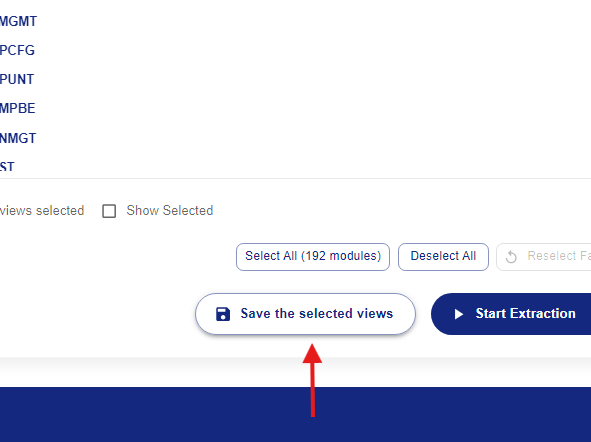
Select Save the selected views to store your selection for reuse later. IntelliAI confirms with a message showing how many views were saved. You can start an extraction with or without saving your selection first.
5. Start the Extraction
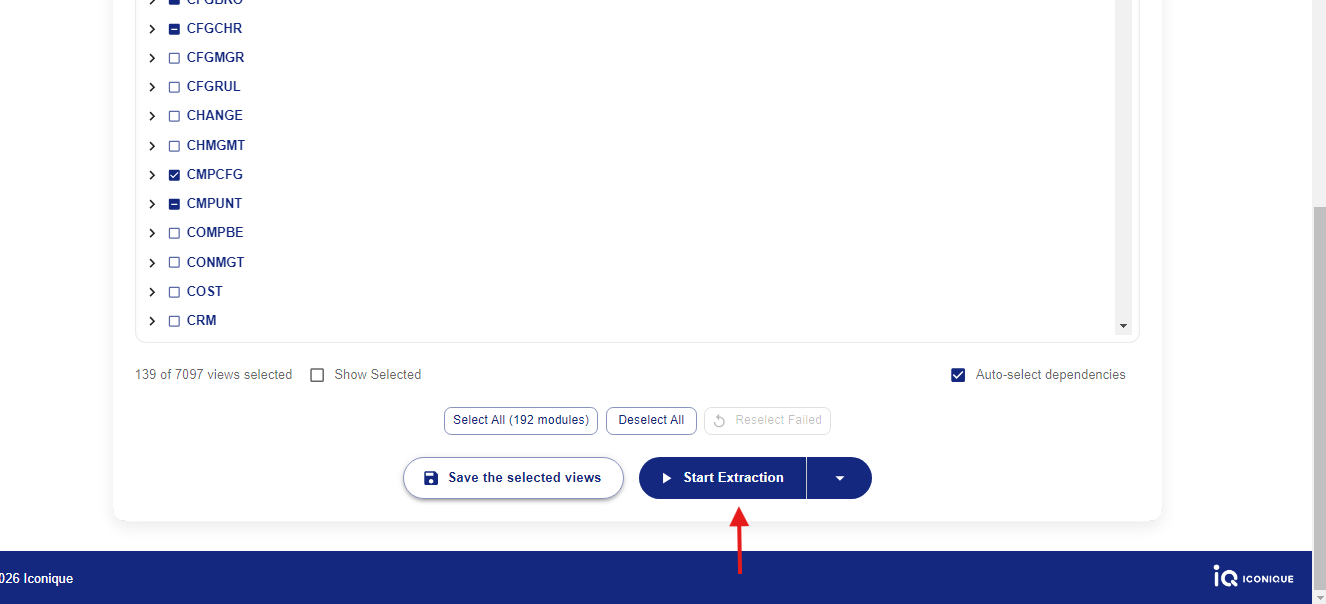
Select Start Extraction. This button is enabled once you've selected at least one view. IntelliAI confirms the extraction has started and takes you to the extraction's live progress page.
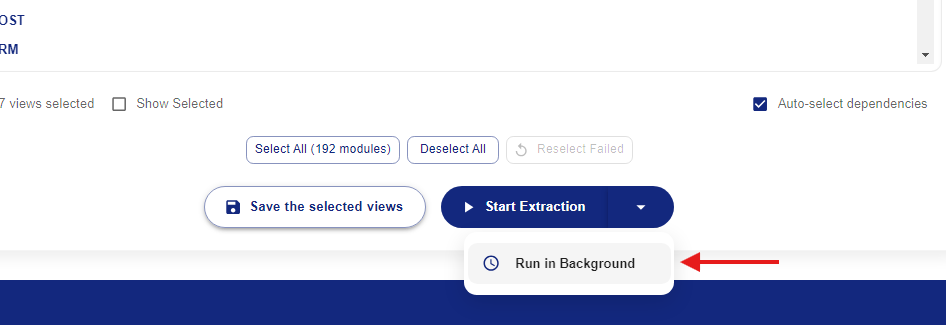
To run the extraction in the background instead, select the arrow next to Start Extraction and choose Run in Background. Use this for larger extractions you don't need to watch closely. The progress page works the same way either way; its summary is labeled Extraction Summary - Online or Extraction Summary - Background depending on which mode you chose.
While an extraction is running, IntelliAI keeps your computer from going to sleep, so a long-running extraction won't be interrupted. Your screen can still turn off or lock as normal; only system sleep is prevented.
6. Monitor Progress
The extraction progress page shows:
Overall status (Running, Completed, Failed, or Terminated) and percent complete
Start time, end time, and duration
A summary of how many views are total, completed, successful, and failed
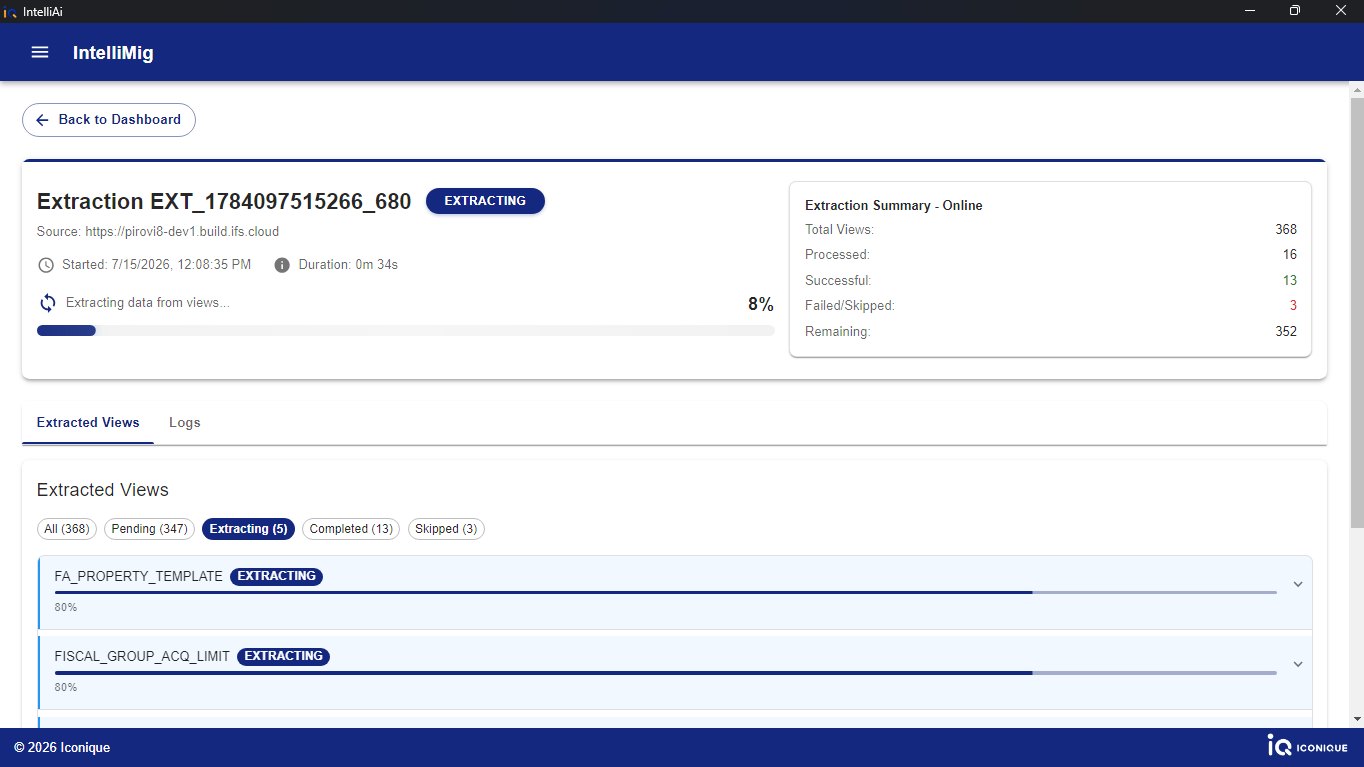
Two tabs give you more detail:
Extracted Views: each view's status (Pending, Extracting, Completed, Failed, Completed With Warnings, or Skipped), with a progress bar and expandable logs per view
Logs: the full log stream for the run
If your connection drops mid-run, IntelliAI shows a reconnecting banner and resumes updating automatically once it reconnects.
7. Sequence Extraction
After selected views finish extracting, IntelliAI automatically extracts Oracle sequences from your source environment. You don’t start this separately, it runs as the last step of the same extraction.
In Logs, look for messages such as:
Starting Oracle sequence extraction...
A success message showing how many sequences were saved (for example, Extracted N sequence(s) to .../metadata/sequences.json)
Sequence files are saved under IntelliAI’s metadata folder as sequences.json. This file is used later when you ingest data into a destination environment.
Some system and identity sequences are excluded automatically and won’t appear in the snapshot. If sequence extraction fails:
By default, the overall extraction run is marked Failed
Details appear in the Logs tab
View CSVs that already extracted successfully remain on disk even if sequence extraction fails.
8. Returning to an Extraction
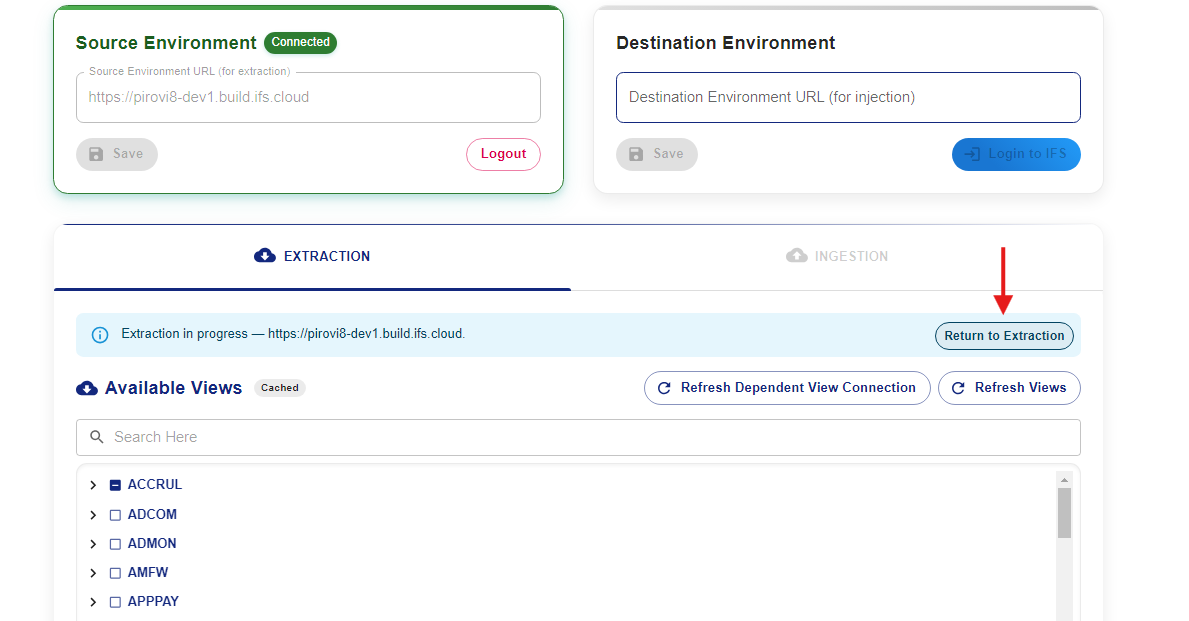
If you navigate away from the progress page while extraction is still running, for example back to the IntelliMig tab, IntelliAI shows an Extraction in progress banner with a Return to Extraction button that takes you back to it. This works even if you close and reopen IntelliAI while the run is still in progress.
9. Re-selecting Failed Views
The summary distinguishes successful views from failed ones, and you can filter the Extracted Views tab to show only failed views along with their logs.
To retry just the views that failed, go back to the IntelliMig page and select Reselect Failed. This selects only the views that failed in your most recent extraction, so you can start a new extraction for those views alone.
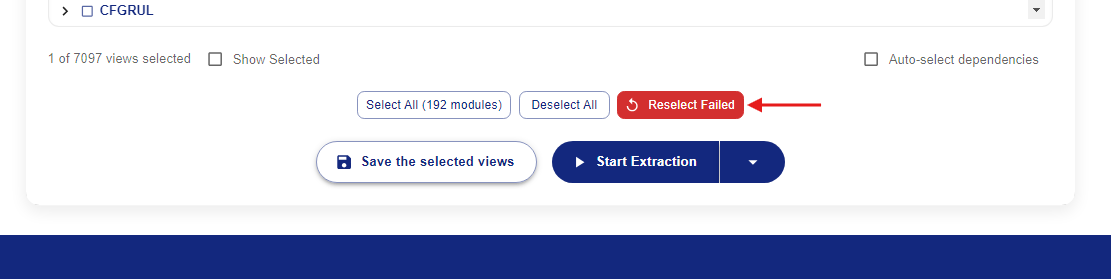
You can also run this retry in the background: after selecting Reselect Failed, select the arrow next to Start Extraction and choose Run in Background, the same as any other extraction. This is recommended for large views, since they're more likely to fail again in an online run.
10. Rows Skipped During Extraction
If a view contains rows with an invalid CSV structure, IntelliAI skips just those rows and still extracts the rest of the view. The view's status shows as Completed With Warnings, with a small N rejected label next to it.
This status doesn't have its own filter chip on the Extracted Views tab, so look for it under All rather than under Completed or Failed. Expand the view to see how many rows were extracted versus rejected, and select View rejected records to open the file listing the rejected rows.
11. Where Extracted Data is Stored
Extracted views are written as CSV files, one per view, to IntelliAI's extracts folder on disk (Data/DataMigration/extracts). This data persists between app runs, so you don't need to re-extract a view to access its most recent output.
Starting a new extraction overwrites the CSV file for any view with the same name from a previous extraction. If you need a previous extraction's output preserved, ingest it before running a new extraction over the same views.
12. Archiving and restoring extracted CSVs (v1.2.0+)
If you need to clear out your extracts folder to start a fresh extraction, but want to keep your current CSVs for later, use Archive & Restore rather than deleting them.
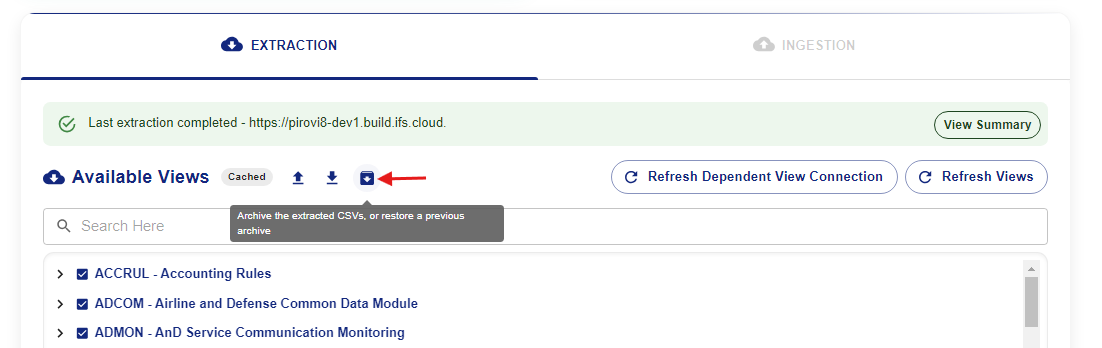
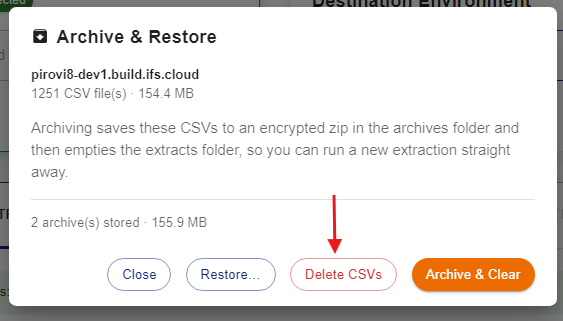
Select the archive icon next to Available Views (tooltip: Archive the extracted CSVs, or restore a previous archive). This opens the Archive & Restore dialog.
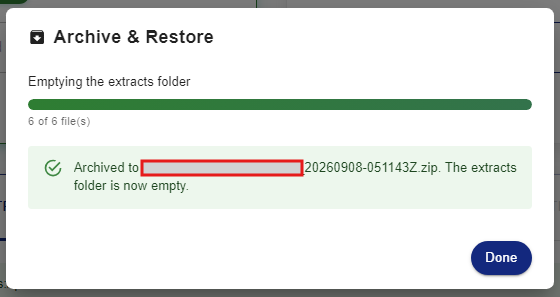
Select Archive & Clear. IntelliAI saves everything currently in your extracts folder to an encrypted archive file, then empties the extracts folder so you can run a new extraction right away.
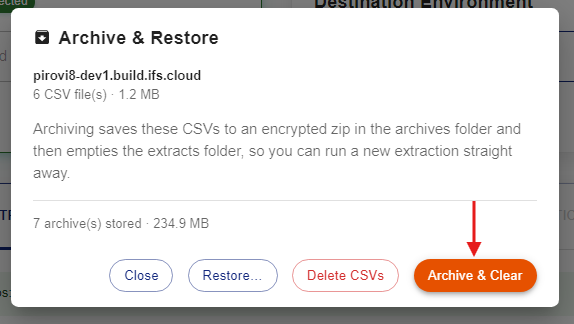
IntelliAI confirms with a message like Archived to <name>. The extracts folder is now empty.
12.1 Restoring an archive
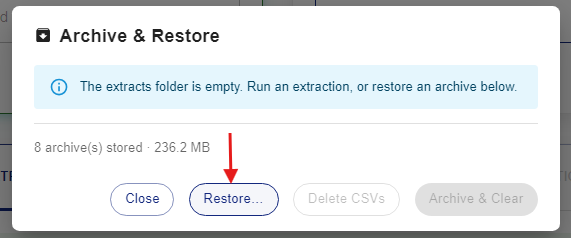
In the Archive & Restore dialog, select Restore….
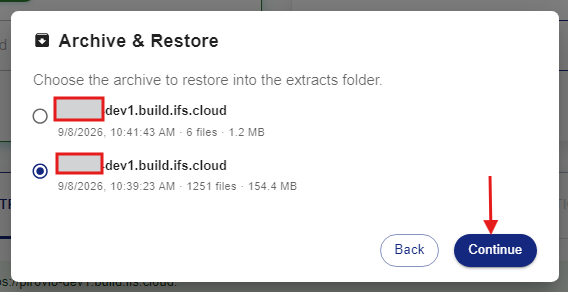
Choose the archive you want from the list, then select Continue. Each entry shows its environment, when it was created, and how many files and how much space it uses.
Review the confirmation screen. It tells you how many files will be added, replaced, or removed compared to what's currently in your extracts folder, and warns you if anything would be removed.
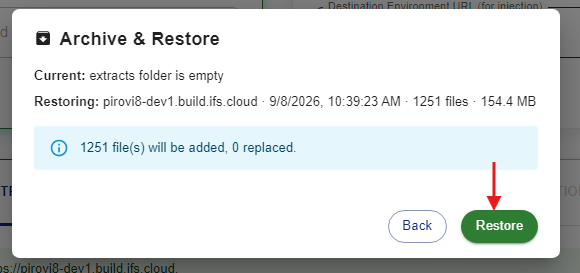
Select Restore.
IntelliAI confirms with Restore complete. The extracts folder now matches the archive. Restoring replaces your current extracts folder with the archive's contents rather than merging the two, so anything not in the archive you're restoring is removed. If you want to keep your current CSVs too, archive them first before restoring a different one.
An archive can only be restored on the same machine and user account that created it, since it's encrypted the same way as your extract files. If you need to move a data load to a different machine, use Moving a data load to another machine instead.
Archiving, restoring, and deleting are all unavailable while an extraction or ingestion is running, or while another archive operation is already in progress.
12.2 Deleting extracted CSVs
The same Archive & Restore dialog also has a Delete CSVs option, for when you want to clear the extracts folder without keeping an archive. This asks you to confirm with Delete Permanently, and can't be undone.
This feature was introduced in the release v1.2.0.
13. Encrypted Extract Files (v1.1.0+)
IntelliAI can encrypt your extracted CSV files at rest, using a key tied to your machine. This is on by default and normally works with no visible effect: your extracts folder just always has encrypted files in it.
You can turn this off yourself. On the machine IntelliAI is installed on, open %PROGRAMDATA%\IntelliAI\user.properties in a text editor and set:
csv.encryption.enabled=falseIf you change this setting after files were already extracted under the previous setting, you may see:
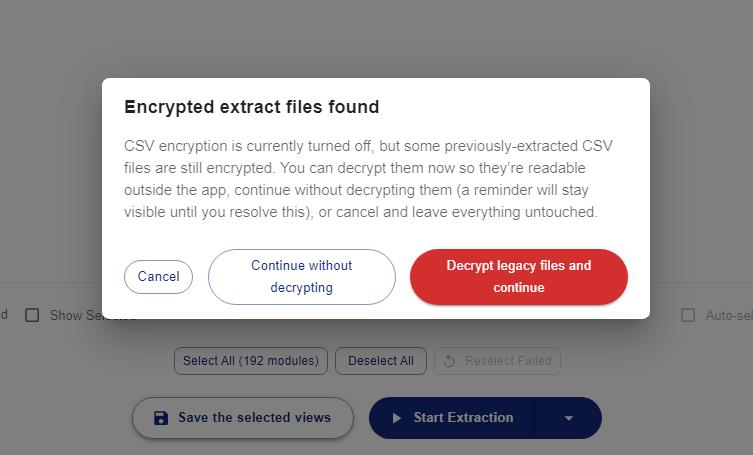
A dialog titled Encrypted extract files found, offering Continue without decrypting or Decrypt legacy files and continue.
A banner warning that some legacy CSV extract files are still encrypted, with a Decrypt now link.

Because the encryption key is tied to your machine, encrypted extract files can't simply be copied to another machine and read there. To move extracted data to another machine, use Moving a data load to another machine instead.
This feature was introduced in the release v1.1.0.
14. Moving a Data Load to Another Machine (v1.1.0+)
To share extracted views with another machine, for example to continue ingestion from a different computer, use Export and Import rather than copying files from the extracts folder directly. Export doesn't just copy your CSV files, it packages them into a single archive encrypted with a password you set, so the data load stays protected in transit and only someone with that password can open it.
14. 1 Export
Select the views you want to share, the same as for extraction.
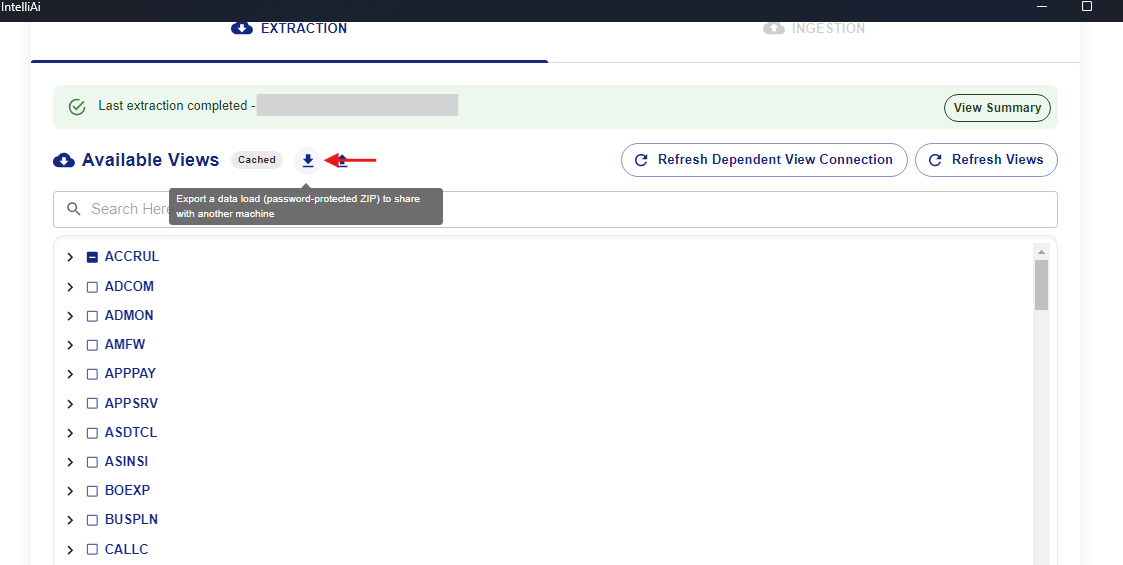
Select the Export icon next to Available Views.
In the Export Data Load dialog, review the views listed, set a password, and confirm it. IntelliAI doesn't store this password: if you lose it, the export can't be recovered.
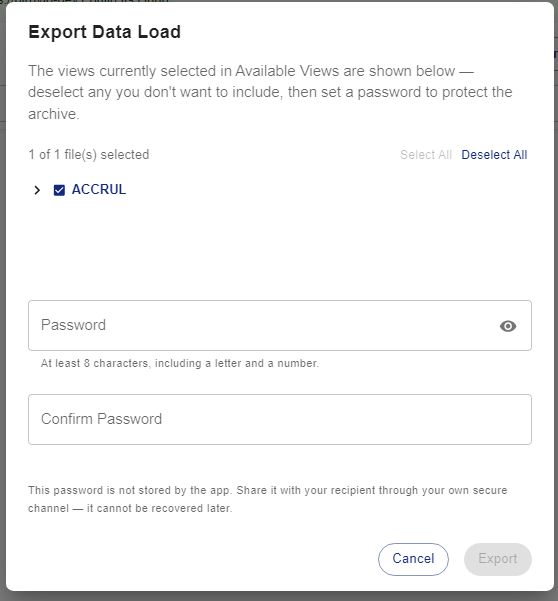
Select Export, then choose where to save the file in the native save dialog. IntelliAI creates a password-protected
.zipfile, for exampleIntelliMig-Export-<timestamp>.zip.
Progress for the export appears on its own page, the same way extraction and ingestion progress do.
14.2 Import
On the machine you're moving the data load to, select the Import icon next to Available Views.
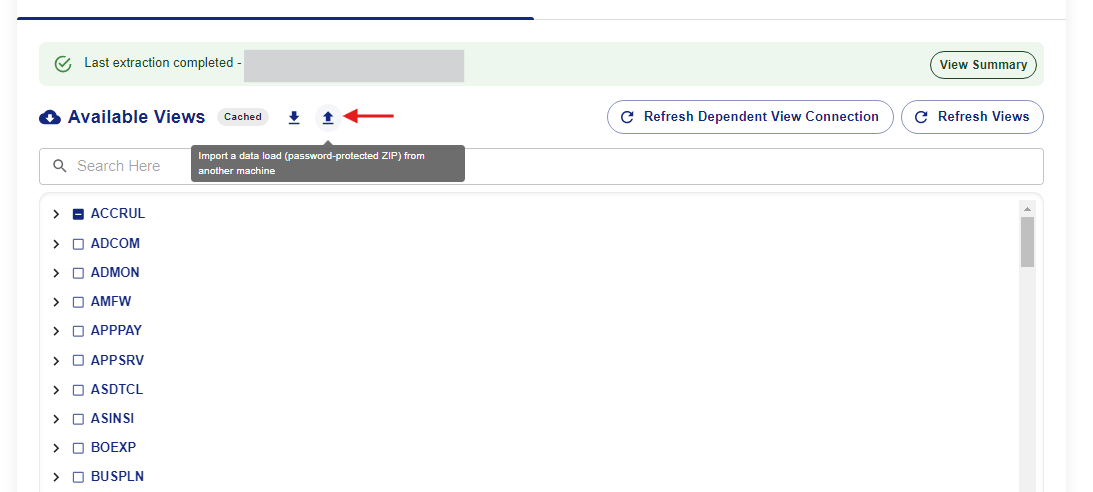
In the Import Data Load dialog, select Choose Archive… and pick the exported
.zipfile.If importing would overwrite views already extracted on this machine, IntelliAI asks you to confirm before continuing.
Enter the password the file was exported with, then select Import.
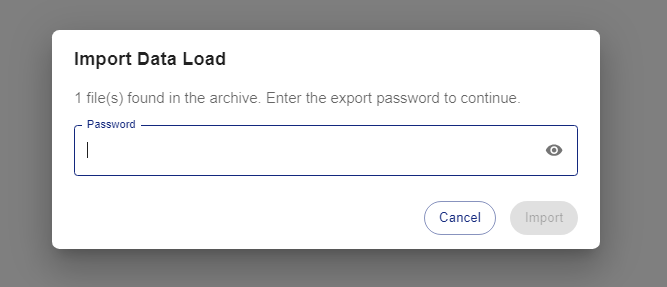
If the password is wrong, nothing is changed. Once imported, the views are re-encrypted under this machine's own key if encryption is turned on here.
Import only restores the CSV files themselves, not the view metadata that the ingestion tab reads from. Until you run an extraction, the ingestion tab shows No extracted views available. Please complete an extraction run first, even though the imported CSVs are already on disk.
To make imported views available for ingestion:
Sign in to your source environment and select Refresh Views to refresh the view catalog.
Select a single view, then run an extraction for it.
Once that extraction finishes, sign in to your destination environment and continue with Ingest data into a destination environment, using your imported CSVs.
This feature was introduced in the release v1.1.0.
15. Next Steps
Last updated 9/10/2026